The normal way of authenticating users in Cryptolens is through license keys. However, there is another way. You can choose to allow customers to use username and password authentication. This blog focuses on how this method works in theory. Please visit the full documentation page if you want to learn about the code implementation. We have also made the following video tutorial which features code examples in Python:
Username and Password Authentication
There are some use cases where it might be more convenient to authenticate users with a username and password as opposed to a traditional license key. If a customer has a lot of licenses, or if you offer your application both as a web and desktop service, username and password authentication would be a suitable approach.
Step 1 – Access Token Permissions
In Cryptolens, the first step to implement username and password authentication is to select the correct access token permissions. In the “Miscellaneous” section of the access token permissions page, you will find “User Auth Normal” and “User Auth Admin”. It is recommended to use the “User Auth Normal” for the client code. However, in your back-end where you will create new user accounts, the permission “User Auth Admin” is more suitable.
Step 2 – User Creation
In your code, you need to implement a way for customers to sign up and choose a username, password, and alternatively, an email address. This is also where you can assign a customer ID. Please watch the video above or the full implementation page for code examples on how to set this up. After a user has successfully registered, they will appear in the Cryptolens dashboard and be assigned to a Cryptolens customer.
Step 3 – Authenticating Users
Because the user account that was just created is associated with a Cryptolens customer, you will be able to retrieve all of their Cryptolens license keys when they log in. You will also get the license properties such as the features, notes, product ID, and more. From this point, you will be able to proceed with key verification as normal. Once again, please check the full documentation page for code examples and a more detailed guide.
Thank you for reading, please reach out to us if you have any questions!
The goal of this blog is to explain the 5 easy steps on how to add Cryptolens SDK into a Rhino 3D plugin. If you want to install our software license manager for a Rhino 3D plugin, please also check out our blog on how to get started in .NET. You can find that post here.
This blog will mainly cover how the steps in theory, and if you want code examples, please read the full documentation page for Rhino 3D plugins. We also show code examples in the following YouTube video:
5 simple steps to add Cryptolens SDK into a Rhino 3D plugin
Step 1 – Download the SDK
In our example, we create a plugin based on Rhino 8. When you have your project open, please follow this link to download our SDK on GitHub.
When on GitHub, click on “Releases” and choose the latest release. There are two versions to choose between. “Cryptolens.Licensing.CrossPlatform.zip” can be used if you expect to target platforms other than Windows. Normally, we suggest to try downloading “Cryptolens.Licensing.zip” and checking if all the features you need are supported.
Step 2 – Extract the folder
When you have downloaded your desired file, the next step is to extract the libraries. You will see that we have all of the binaries for all of the platforms on the downloaded file. For this tutorial, we will be using “netstandard.2.0”.
When in the “netstandard.2.0” folder, please copy the folder’s path link.
Step 3 – Dependencies
In Solution Explorer in Visual Studio, right-click on “Dependencies” under the name of your project. In the new menu, click on “Add Project Reference…”.
Step 4 – Browse
In the new window, click on “Browse” in the left menu. Now, click on the “Browse…” button in the lower right corner. In the “File name” field, please paste the folder path that you copied in step 2.
You should now be able to see the file called “Cryptolens.Licensing.ddl”. Please select that file and click “Add”. That should take you back to the original window, and simply click the “Ok” button to complete the step.
Step 5 – Install Newtonsoft.Json
The final step is to install Newtonsoft.Json using NuGet. To do that, right-click on “Dependencies” once again under the name of your project. This time, click on “Manage NuGet Packages…”
In the new window, change to the “Browse” tab and search for “Newtonsoft.Json”. When you find it in the search result, please install it using the down-arrow icon to the right. Click “Apply” in the window that pops up.
Code examples and full implementation
A good step to do next would be to build the project using our key verification code to see if everything is working. We suggest checking out the YouTube video above or going to the full documentation page.
Thank you for reading, please reach out to us if you have any questions!
This blog will cover how to send in-app notifications using Cryptolens Messaging API. There are two main use cases for Messaging API: one is for updates tracking, and the other is for sending messages in general. You can even choose to send in-application messages to all customers, or a group of customers.
We will mainly cover the dashboard setup and theory behind Messaging API. For code examples, you can either check out the YouTube video or see the full documentation page.
Here is the YouTube video covering this topic, including Python code examples:
Updates tracking in the dashboard
When on the Message Page in Cryptolens, you can specify the Channel and Content that you want to broadcast. For updates tracking, you might want to add the URL where customers can download the latest update to the Content field.
You can implement different channels to send the notification only to some customers. You could, for example, have customers choose if they want to download stable updates, or if they also want to be notified when an experimental version is released. The way to do that is to specify “Experimental” in the Channel field. That way, only customers who your application knows want to receive experimental releases will receive the message.
When you are ready to publish, click on “Add”. In the “Broadcasted Messages” section, you will now find the recently broadcasted message.
For code examples, please check out the full documentation page. The YouTube video at the top of this blog will also show the Python setup.
Notifications in the dashboard
When it comes to update tracking, the main purpose is to make sure that the customer is using the latest update. However, with notifications, you always want to display the latest message for that channel. This means some changes to the code, but in the dashboard, notifications are posted the same way as updates tracking.
One use case for notifications could be to broadcast news. For example, you might want to tell your customers that you offer a limited summer discount. Then, on the Message Page in Cryptolens, you can write “News” in the Channel field, and your message in the Content field, such as “We now offer summer discounts”.
If you want to send in-app notifications for both updates tracking and other notifications, you can simply set up different channels. Use, for example, “Stable” and “Experimental” for updates tracking, and “News” for notifications.
Not a customer yet?
With Cryptolens software license manager, you can implement software licensing within minutes!
So, you want to implement node-locked licenses into your product’s code. This blog will cover the node-locked licensing model and how to set it up in Cryptolens. For the code examples, please read the following documentation page.
You can also watch this video for the dashboard and code tutorial:
Implementing Node-Locked Licenses
First of all, what is the difference between the node-locked and floating licensing models? With node-locking, count the maximum number of machines that are able to activate that license key. Floating licenses instead count the number of concurrent users. This means that you do not have to deactivate a machine once the device limit has been reached.
Implementing node-locked licenses is effortless with Cryptolens. When creating a new key in the Cryptolens dashboard, you can simply specify the maximum number of machines in the “Advanced Settings” field. As long as that field is greater than 0, that license key uses the node-locked licensing model! For this example, let’s set the limit to 2.
If you go to the product view, you can validate that it works. That license key should now have a field in the “Devices” row that shows how many devices have activated that license key. In our example, it should say “0/2” since no devices have been activated yet.
When you have set up the coding implementation, you will see that number change to “1/2” when the first device activates the key. If you click on the wrench icon to the right of the number “1/2” for that license key, you will bring up a new view.
Here, you can see some parameters relevant to the node-locked model. The machine code of the activated machines, IP, and time are available parameters. This is also where you can delete machines. Simply click on the red cross icon in the last field to the right to deactivate that machine.
Remember that when the device limit has been reached, deactivating another machine is the only way to allow more machines to activate.
So that is how you implement node-locked licenses in Cryptolens! Watch the video above or read the full documentation page to see the code examples.
Today’s blog will feature how you implement subscription licenses. The use cases you can have for subscription licenses will be covered, and how you integrate your payment provider such as Stripe.
The most common way to implement subscription licenses is the Software as a Service (SaaS) model. That is where you restrict access to the product when a license expires. You can also allow customers to use the product without a valid license, but they are not allowed newer upgrades. You can also tie the subscription to a support agreement so that only people with a valid license get access to support.
All of these methods will be covered today. For the full documentation page on this topic, click here.
We have made the following video tutorial for this topic:
The SaaS Model
The most common use case is where a customer has to pay a monthly or yearly subscription fee to use the product. If they do not pay, their access to the product will be restricted. They would then have to extend the license to continue to use the product. This method is oftentimes seen today with the Software as a Service (SaaS) business model.
In Cryptolens, you can implement this using our pre-made “Expires” field. We already have a blog post covering how to set up time-limited licenses that you can find here.
In short, you have to click on “Edit Feature Names” on the product page and click the checkbox “Treat all licenses as time-limited”. Now, Cryptolens knows that you want to use the SaaS Subscription Model.
When creating a license in Cryptolens, you can specify for how long the license should be valid. If you want to extend the expiry date, simply click on a particular license and you can either choose a date in the calendar or choose to extend the license for X amount of days. You can also automate this by integrating with your payment provider. We cover that topic at the end of this blog.
An important last step to remember is to make sure Cryptolens blocks all expired licenses. You can find that tutorial here, but that should only be done for this method of implementing subscriptions.
Restrict Access to Updates and Support
Some software developers want to continue to allow customers to use the software after the expiry date has been reached. However, without a valid license, a customer cannot get access to updates. This would still incentivize the customer to keep extending their license.
Let’s take an example of how this could work in practice. Let’s say that a customer buys your software at the launch of version 1.0. Their license expires right as you release a minor update, version 1.1. The customer can get access to that minor update and continue to use the product even though their license has expired. However, when you release a major update to version 2.0, the customer is not able to access that version without a valid license.
You implement this version of subscriptions by using data objects. In Cryptolens, you would create a new data object and use it as metadata. Create a new data object and call it, for example, “major_version”. Give the IntValue field the value 1 if you want your version to be 1.0. Click on Create. Now, you have a way to track major releases of your application.
If you want to keep allowing customers with expired licenses to use the product, another way to incentivize them to renew the license is to limit the support given to customers without a valid license. This essentially means that they subscribe to a support agreement rather than to the product itself.
For more information on how to implement this model, please check the full documentation page. For this method, you should not tell Cryptolens to block expired licenses automatically, since you want people to keep using their version of the application.
Implementation with Payment Providers
You can manually extend the expiry date in the Crypolens dashboard, but it might be beneficial for you to automate the process so that the expiry date of a client is automatically extended after a successful payment has been made.
In the Cryptolens API, there is a method called the ExtendLicense method. When a successful payment has been made by a client, use that method when calling our API to automatically extend their license. This method works no matter if you are using Stripe, PayPal, other providers, or even an internal payment system.
For more information, please read this page in our documentation. There, we also have API methods to automatically create a new license key, add features, block the license, and more.
You now know how to implement subscription licenses in Cryptolens!
Do you want to license and sell a software product? Then you might be interested in understanding the differences between subscription VS usage-based licensing. The two licensing models are beneficial in different ways, and we will in this blog give you guidance on what to choose.
If you want to read more about licensing models, please read our help pages. We made the following video covering subscription VS usage-based licensing:
When to choose usage-based licensing
First of all, what is usage-based licensing, and how does it work? Usage-based licensing is when you charge a customer for a specific action. For example, you might sell software to photographers where they can edit photos. Instead of charging your customers a subscription fee once a month, you can charge a customer per photo that they edit in your software.
One benefit is that you can charge the customer more fairly. Enterprises that use your software every day pay a high price. Startups that use your software once in a while are allowed to pay a lower price.
So when should you opt to charge per usage instead of a subscription fee? The value that your customers get from your product must be highly correlated to the specific action you want to charge for. This simply means that the actions you charge for need to provide a lot of value to your customers.
Your editing software from the example provides value to your customer only when the customer edits a photo. Therefore, it is appropriate to consider usage-based licensing for such a software product.
When to choose subscriptions
Great! But when is it not a good idea to charge customers for certain actions? We covered earlier that usage-based licensing allows you to attract both small and large customers since they can have their own prices depending on their usage.
If you are selling multi-purpose software where you cannot find one specific action that gives all of your customers a lot of value, subscriptions can still allow you to charge customers different prices.
By implementing different pricing plans with different feature sets, you can motivate enterprises to pay a higher subscription fee to get full access to your product. Startups can then get a more basic version without all of the features at a smaller price.
Cryptolens makes it effortless to license and sell any type of software application, no matter if you want to implement subscriptions or usage-based licensing.
When you have a lot of licenses in the Cryptolens platform, it can be useful to search for specific properties such as blocked/active, the created-on date, and so on. In this blog, we feature some of the queries you can run to effectively filter search results in Cryptolens.
This blog is based on the following two help pages relating to sorting and ordering. For a video guide, please watch the following YouTube video.
Searching licenses using Linq Queries
One of the most basic ways of searching for licenses is to simply paste the license key into the search field.
You can also search for all licenses with a specific property. For example, you can find every license key that has Feature 1 set as true by pasting the following text into the search field.
f1=True
You can use the same logic to search license keys based on other features. Below, you will find the query for finding blocked licenses.
Block=True
If you instead want to find all licenses with the period set to 30, you can do so by pasting the following query into the search field.
Period=30
Advanced searching
A more advanced way of searching for licenses is to find licenses that have been issued after a particular date. To do so, please see the following query example.
created > DateTime(2024,05,01)
The same logic can be applied with the parameter “expires”.
Furthermore, you can search for all license keys that have been activated on a device. For this example, let’s find all license keys that have at least 2 activated devices.
ActivatedMachines.Count() >= 2
Let us now assume that you just received an email from a customer saying that they have lost their license key, but they provided their machine code.
You can then search for licenses that have been activated by a particular machine ID using the following query:
You would simply replace “machine code” with the machine ID of your customer.
There is a similar way to search for license keys if you are using the API. The method is called GetKeys, and the same queries can be used if you prefer to use the API.
There are many more properties you can use to filter search results in Cryptolens, and we have them all listed here.
Customizing the order of license keys
As you can see in the Cryptolens dashboard, there are different preset ways of ordering license keys. For example, you can order by feature and creation date.
For more advanced customization of the ordering, please visit this help page.
If you have any questions, please contact [email protected]. Thank you so much for reading!
When you are thinking about licensing and selling your software product, you probably come across the question “How do you implement a software licensing system?” When you want to license and protect your software application, a software licensing solution could be the key you are seeking. Below, we will cover the basics of how to implement a software license management system.
Implement a software licensing system
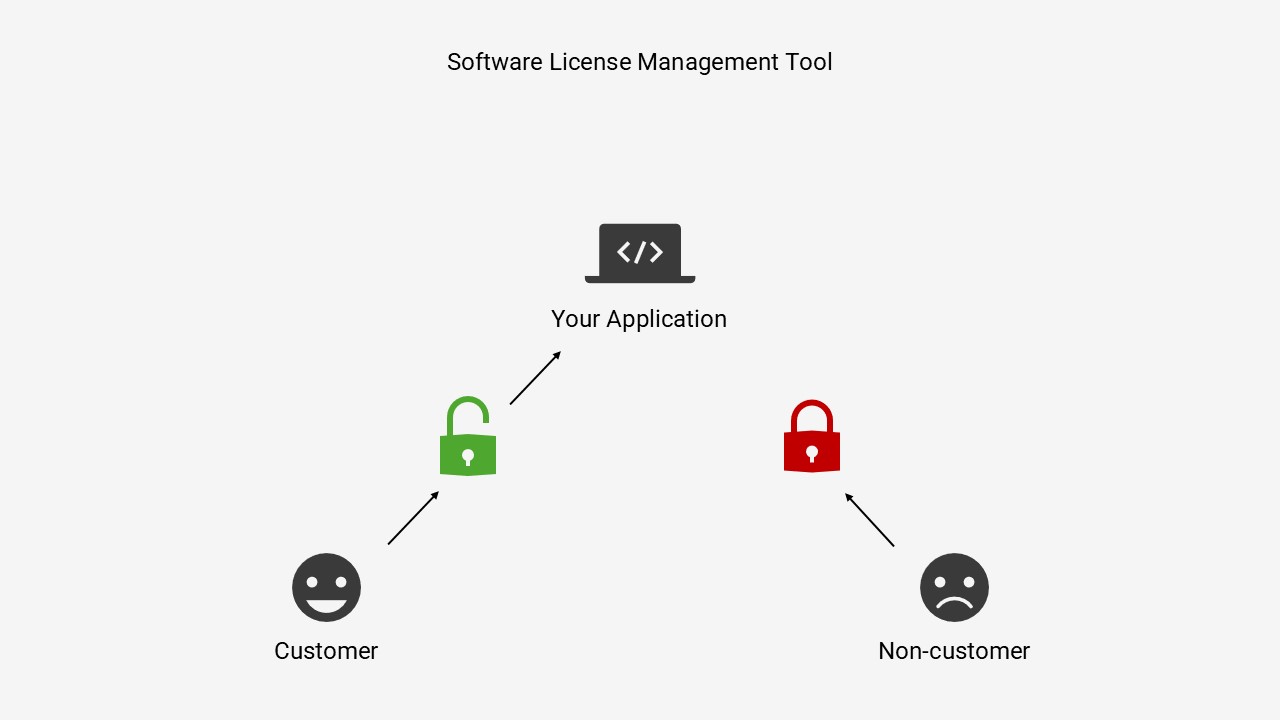
A software license management solution has to establish a lock in your software code that only allows entry to people who put in a valid digital license key. If the key is invalid, or if they are unable to insert a key, the system should deny entry to the application. Without this system in place, anyone can access your software app, and it becomes very difficult to sell such a product. That is why a software licensing solution is important when protecting your code against unauthorized users.
Great, so how do you implement such a system? Well, there are essentially two ways. You can either code your own license key generator, or work with a Licensing as a Service (LaaS) provider. We have made other blog posts covering both of those options in greater detail, but let’s now cover the fundamental differences.
How to License Software – License Key Generator
A license key generator is a script that allows you to generate sub-sets of license keys and set up a script that checks the validity of that license key string. This is a lightweight solution that works quite well, but since it only performs partial key verification, and since the structure of the license keys will start to leak over time, it is not the optimal solution for long-term and more serious applications.
Furthermore, having an internal software licensing solution comes with some disadvantages. Coding your own system in and of itself will take a lot of time, and making sure it holds up in the long run will take even more time. However, it may still be preferable in some instances, and you can read more about such a solution here.
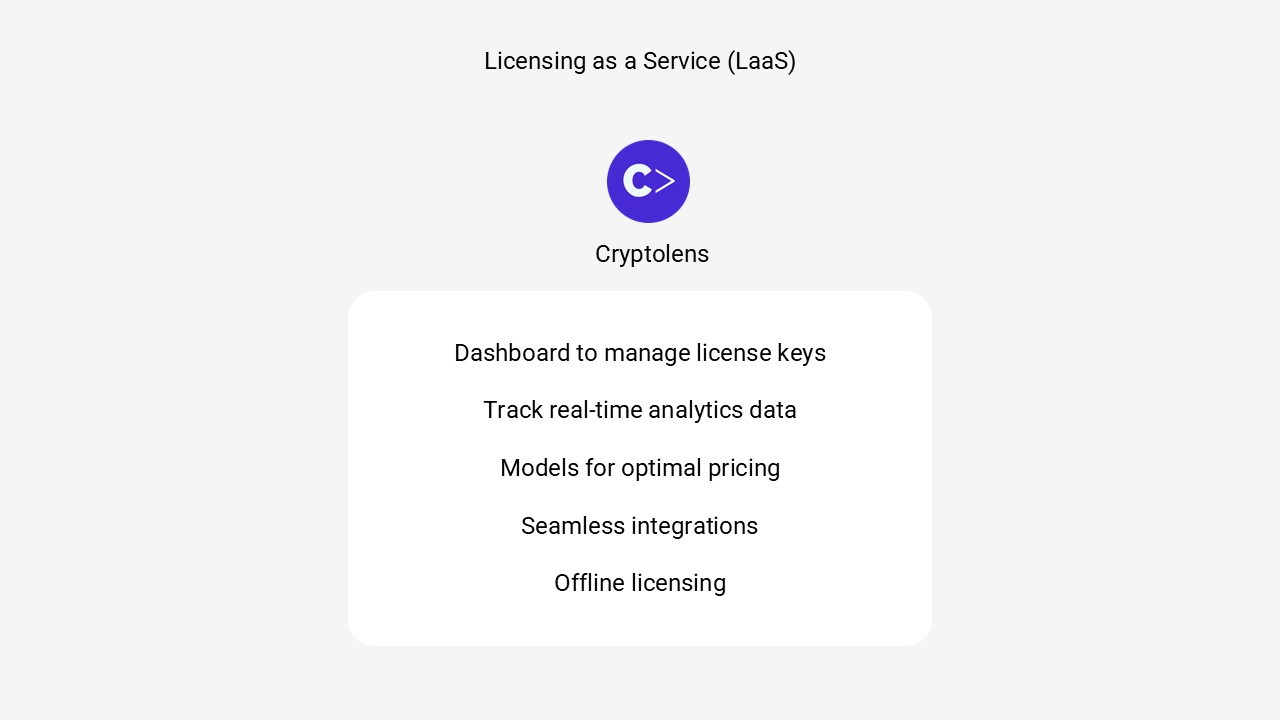
Outsource Licensing – Licensing as a Service (LaaS)
1. Let us begin with the SDK. Cryptolens offers comprehensive SDKs in your favorite programming languages to make it effortless to implement a Licensing as a Service (LaaS) platform within minutes. Install our SDK in your language here.
2. Create a free Cryptolens account to get access to our easy-to-use dashboard where you can create and manage license keys and restrictions. You can also find your access tokens and other parameters that you have to insert into your code. Cryptolens offers you a way to implement licensing for free at your own pace, and you only have to pay when you get customers of your own. Check out our pricing plans here, and you can always get started for free.
3. The last step is to insert a code snippet into your application’s code. We provide comprehensive help guides to make the implementation seem effortless. The following image gives a summary of how our code snippet looks. See the code snippet in your programming language here.
Please visit our help pages if you want to learn more. You can also learn about software licensing basics in the following video:
Are you new to Cryptolens? Welcome! We are dedicated to offering an easy-to-use Licensing as a Service (LaaS) platform so you can license and sell your software application within minutes.
Users expect some software products to run in offline settings. Then, the software needs offline license verifications to confirm the customer’s license key. In this blog, we will cover how to set up offline verification in theory and in practice, regarding two major use cases:
1. When a customer is allowed to temporarily be offline (for example, use the license while they are in airplane mode).
2. When a customer is allowed to permanently be offline (for example, behind a corporate firewall).
This blog is based on the following page in our documentation.
Here is a YouTube video covering the same topic:
Background
Let us refresh our memory of the standard license key verification code. For the remainder of this blog, we will cover example codes in Python, but the process is similar in other languages.
result = Key.activate(token=auth,\
  rsa_pub_key=RSAPubKey,\
  product_id=3349, \
  key="ICVLD-VVSZR-ZTICT-YKGXL",\
  machine_code=Helpers.GetMachineCode(v=2))

if result[0] == None or not Helpers.IsOnRightMachine(result[0], v=2):
  # an error occurred or the key is invalid or it cannot be activated
  # (eg. the limit of activated devices was achieved)
  print("The license does not work: {0}".format(result[1]))
else:
  # everything went fine if we are here!
  print("The license is valid!")
When Key.Activate is called, it calls Cryptolens API, which in turn returns a signed JSON object placed in the result variable. This allows you to proceed as normal and check features, expiry dates, and other parameters. In the code above, we are checking if the license is activated on the correct machine.
Using the following code in Python, we can save the JSON object to disk, allowing us to read it again when the customer lacks internet access.
# res is obtained from the code above
if result[0] != None:
  # saving license file to disk
  with open('licensefile.skm', 'w') as f:
    f.write(result[0].save_as_string())
Case 1 – Temporarily offline
If customers are expected to be offline once in a while, it is considered good practice to always attempt to make the key.activate call, and only load the saved license file from disk if the customer is offline and key.activate fails.
The following Python code example shows you how to load the saved license file from disk:
# read license file from file
with open('licensefile.skm', 'r') as f:
  license_key = LicenseKey.load_from_string(pubKey, f.read(), 30)

if license_key == None or not Helpers.IsOnRightMachine(license_key, v=2):
  print("NOTE: This license file does not belong to this machine.")
else:
  print("Feature 1: " + str(license_key.f1))
  print("License expires: " + str(license_key.expires))
Notice that the parameter load_from_string has “30” set as a parameter. This means that the customer is only allowed to use the software offline for 30 days. You can customize this value so it suits your use case. For example, you may want to change it to 7, if you only want to allow a customer to be offline for a week.
When the date has been reached, the customer will need a new license file (which may be obtained by successfully calling key.activate), which can be done with the LoadFromFile method.
You could also remove the “30” parameter if you do not want to set a limit at all.
If you want to see more code examples in Python, please visit our GitHub page.
Case 2 – Permanently offline
To support customers to be fully offline and still use your software for a long period of time, you would have to send the license file to your customers since they cannot call key.activate.
There are four methods you can use:
Calling key.activate on your end and sending the file to your customer. You can automate this method.
Using Activation forms hosted by Cryptolens for an easier solution.
Obtaining the file manually in the dashboard.
An On-premise License Server by Cryptolens for when you anticipate many end users or want to support floating licenses offline.
1:
The first method is where you call key.activate on your end and send the license file to your customer, for example, over an email. If you would like, you could set up an automized way where your customers can request to download their license file from your dashboard. This could, however, become somewhat complex.
2:
An easier way is to use activation forms by Cryptolens. When inside the Cryptolens dashboard, open the tab called “Forms”, and click on Activation Forms. This form performs a call to key.activate much like you would do on your own in the previous method, but we provide a simpler GUI for your and your customer’s convenience.
Using the form, customers can simply enter their license key and machine code, click on active, and they will obtain their license file that they can insert on their machines.
3:
You can also manually download the license file from the Cryptolens dashboard. Go to the desired product page, find the license key you want to download the license file of, and click on the yellow wrench icon to the right of the key. Click on “Download activation file” and send it in your desired way to your customer.
4:
All of the above-mentioned methods are useful when there are only a few employees on site who would use your software offline. But, if you anticipate that your customers will have many end users, or if you want to support floating licenses offline, you can use an on-premise license server that Cryptolens provides. Please read the documentation relating to the on-premise license server to learn more about this approach.
Thank you for reading this blog about setting up offline license verifications in Cryptolens, please feel free to ask questions to [email protected].
A common question in today’s digital world is “How does software licensing work?”. Understanding the basics of software licensing allows you to make smarter decisions, regardless of whether you are buying a software license from a software vendor or handing out licenses to customers as the software vendor.
Why is software licensing important? Well, in order to not over-pay for a software product, consumers must choose the right licensing type, such as a subscription or usage-based model, along with the correct pricing plan. Software vendors, on the other hand, have to make sure their software is able to know who is allowed access and for how long. Ultimately, software licensing is so important to many software vendors that without it, they can simply not sell their products at all.
This blog will first focus on the basics of how software licensing works for a person buying a software license. Then, we will move over to cover how a software vendor uses software licensing to charge effectively for their software product.
Explaining How Software Licensing Works – Consumer’s Guide
What is a software license?
When you are buying a software product from a software vendor, they might have you buy a software license. So, what is a software license? Well, many software products today are actually not purchased in the same way as you might purchase a physical product. When you buy an apple, for example, no one can tell you what to do with that apple once you’ve paid for it.
However, software products usually work slightly differently. Instead of gaining full control over a software product when you have paid for it, you most likely will be granted restricted use over it. A common type of software product today is Software as a Service (SaaS), where you pay a subscription fee every month to keep on using the product. If you don’t pay, you will lose access to the SaaS product.
A software license then establishes the terms and rules that apply when you are using the product. When you buy a license to use a certain software product, you agree that you will pay a recurring sum every month to continue to use the product, for example.
What happens when you don’t pay?
In a similar way to a driver’s license, a software vendor can choose to withdraw your software license if you do not comply with the software license agreement. Instead of speeding and losing a driver’s license, software licenses are usually withdrawn when you fail to pay the recurring subscription fee. That means that your ability to use the software product gets restricted to partial use, or you might not be able to use the product at all.
Great, but how can a software product know that I as the consumer have paid my latest subscription? Well, that’s where license keys come in! Some applications force you to insert a license key before you are allowed to use it. When you pay your first fee to the software company, you might then get a license key string (usually a short combination of letters) that you have to insert into the application. Today, many companies tie these license keys to a user account, so you simply have to log in to your account and the application knows what license keys are associated with that account (account-based licensing).
When you try to access the application after failing to pay your latest subscription fee, the software licensing system will realize that the key you are inserting is invalid. Then, it will not allow you to use the application.
Pricing plans and licensing models – Save money with software licensing
Now I want to mention how you can use your software licensing knowledge to save money as a consumer of software products using pricing plans. Many SaaS products can be purchased (or licensed) on different pricing plans, where each pricing plan has a different set of features that you have access to. For example, a SaaS product can have a Basic and Advanced pricing plan. The Basic plan might cost $50/month and only include the basic features of the app. The Advanced plan then unlocks more advanced features and might instead cost $100/month.
As a consumer, you will naturally choose whatever pricing plan suits your needs. You might begin on the Basic plan to find out if you really need the product. If you do, you can simply upgrade to the Advanced plan when the time is right. That’s pretty simple, right?
However, when the product gets more complicated, so may the pricing plan options. You might be able to choose between different licensing models, for example. The pay-per-use licensing model is quite common. Then, you pay each time you use a specific feature in the product. Accounting software might charge users for each report that is generated, for example.
Instead of taking the easy way out and choosing the biggest pricing plan just in case, thinking a bit longer and investigating what pricing plan you really need can then save you a lot of money in the long run. Without the ability to choose pricing plans, all software products would have to be sold at a standard price, which could mean that you overpay for a product that you don’t use that much. Thanks to software licensing, you can then access more software products at more affordable prices!
How Software Licensing Works for Software Vendors
As previously mentioned, a customer is able to pay an appropriate price for the software product thanks to software licensing. If it works optimally, small users don’t feel like they are overpaying, but you can still have larger users pay a more reasonable price. For software vendors, there is a great benefit to be had if your customers feel like they are paying an appropriate price. It can enable you to get more customers while big users of your product still pay a fair price.
Let’s now focus on how to implement a software licensing solution. Firstly, what does such a software licensing system need to do? Well, the most basic task is of course to establish a lock in the application that requires a user to interest a license key. Then, it also has to be able to check the validity of the inserted license key.
Can you code such a system yourself? Yes, of course you can, but it will take time. A lot of time. Not only will it take time to develop, but you also have to maintain the system and make it scalable. If you don’t you may run the risk of getting angry emails from customers saying they can’t access the product they pay good money for, and that’s never a fun email to read. Additionally, coding advanced licensing features such as usage-based licensing or offline license verifications is not an easy thing to do (if you want to learn more, here is a quick post about in-house VS outsourcing software licensing).
As a result, more and more software developers are today outsourcing software licensing to experts, which is the topic of the rest of this blog post.
Implementing a Software Licensing Solution
A cloud-based Licensing as a Service (LaaS) provider such as Cryptolens will do most of the heavy lifting. When a user of your software signs up, your software sends a request to our license server where the information about all of your licenses is stored. The license server then checks if all of the requirements are met. For example, was the customer’s last payment successful?
If all of the requirements are satisfied, the license server sends a response back to your software that tells it to run as normal. If, for example, the customer did not pay their last payment, the license server will tell your software to display a message telling the customer what they need to do to gain access to the software again.