Tag: software licensing system

Licensing software running on Raspberry Pi

We are continuing our work on making the .NET SDK cross platform. In the latest release of our .NET library, we have added support for machine code computation on Raspberry Pi and improved the existing support for Linux.

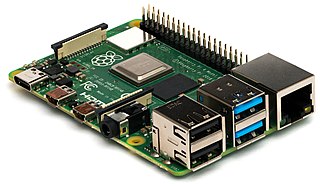
Image of Raspberry Pi 4 Model B. Credits Michael Henzler. License CC BY-SA 4.0.

From a licensing perspective, being able to identify a device is important in order to make it possible to limit the number of end users that may use the same license. Treating a device id as an end user is very common, even though an end user can also be defined in other ways too (for example, to include the process id or username).

How to get started

To get access to the updated methods, you just need to upgrade to the new cross platform version of the library.

dotnet add package Cryptolens.Licensing.CrossPlatform

In that version of the library, both Helpers.GetMachineCode and Helpers.GetMachineCodePI work the same way. If you prefer to use the pre-compiled binaries, these can be obtained here. It’s important to use the ones in the “Without System.Management” folder.

How it works

Every Raspberry Pi board comes with a unique serial number. The updated methods first determine whether it is a Raspberry Pi board, and if it is, hash the serial number. The machine code is of the structure “RPI_{SHA256(serial number)}”. More technical information is available in the release notes.

Related articles

Sign up customers automatically for the customer portal

A recent addition to the platform is the ability to sign up customers automatically to the customer portal. Instead of creating a customer manually or through the API, you can publish a generic link that will automatically register a customer with your account. This link can be found on the customer page.

In addition to allowing your customers to see their current licenses, the customer portal gives them the option to order new licenses as well as use their login credentials instead of the license key when unlocking your software. We will cover each case below.

Why customer portal?

Listing licenses

When you assign licenses to a customer account, your customers will be able to see all their licenses and their properties, such as the set of features they are entitled to and when they expire.

Recurring payments

If you have set up Stripe with your account, you can allow your customers to sign up for a plan in the customer portal and get instant access to a valid license key. They can also easily manage their subscriptions. You can read more about how you can get started here.

User account authentication

Instead of using a license key, you can allow your customers to authenticate using their login credentials. Cryptolens has developed a state-of-the-art protocol that preserves the privacy of your customers (more information about the protocol can be found here). You can read more on how to get started here.

Managing app settings in software licensing

When developing apps, you will likely need to store some metadata. This can either be specific to a certain user or be shared among all users.

Data objects offer an easy way of managing metadata either on the product, license key or machine code level. They are quite useful since it’s easy to change them as your application evolves and user-specific data will stay the same across all devices.

In this article, we will cover data objects associated with a product.

Editing metadata

To add or edit data objects on the product level, you can click on the Data Objects link as shown below:

On the next page, you can either add or edit existing data objects. The names are case-sensitive and duplicates are not allowed.

Retrieving metadata on app start

Let’s assume our application needs to obtain the currently supported DOTNET_RUNTIME (which we defined in the previous step). This can be accomplished with the code below (the project files are available here).

To get it up and running, we need to specify an access token and modify the ReferencerId. The access token needs to have the “ListDataObjects” permission checked and we also strongly recommend to specify the product it should work with. The ReferencerId should be the Id of the product.

 var systemSettings = Data.ListDataObjects("access token", new ListDataObjectsModel
 {
     ReferencerType = DataObjectType.Product,
     ReferencerId = 3349,  // <- the product id
 });
 
 if(!Helpers.IsSuccessful(systemSettings) || systemSettings.DataObjects == null)
 {
     Console.WriteLine("Could not retrieve the settings.");
 }

 var settings = systemSettings.DataObjects.ToDictionary(x=> x.Name, x => x);

 if(settings.ContainsKey("DOTNET_RUNTIME"))
     Console.WriteLine(settings["DOTNET_RUNTIME"].StringValue);

What’s next?

In the future tutorials we will describe how you can store user specific information. In meantime, let us know if you have any questions đź‘Ť

Data collection for better insights in software licensing

By default, Cryptolens logs most of the requests made to the Web API. This information can give some basic insights into how the application is being used. In the latest release of the platform, we have expanded the list of methods that are being logged.

However, API logs don’t capture all events that could be useful from an analytics standpoint. For example, it won’t tell you the most popular feature, OS or answer questions such as which OS brings in most revenues. As a solution, we have released a new API method that allows you submit additional data, in .NET referred to as AI.RegisterEvent (you can also call the RegisterEvent Web API method directly).

The idea is that this method is called in two ways: inside the app (to track when a certain feature is used) and on the backend (upon a successful transaction.

Inside the app, it can be called as shown below:

AI.RegisterEvent("access token with RegisterEvent permission", 
    new RegisterEventModel { EventName = "start", FeatureName = "YearReportGenerator", Key= "AAAA-BBBB-CCCC-DDDD", MachineCode = Helpers.GetMachineCode(), ProductId = 3,
    Metadata = Helpers.GetOSStats() });

When a transaction has occurred, we can send a GET request to the url below. The only difference is that we have provided a “value” and a “currency”.

https://app.cryptolens.io/api/ai/RegisterEvent?token=<access token with RegisterEvent permission>&Value=30&Currency=USD&ProductId=3&MachineCode=<machine code>

The complete tutorial is available here. As always, let us know if you have any questions 🙂

Support for any number of features

A common request we have received from our customers is to support more than 8 features. Until now, the recommended approach has been to use the notes field or data object fields to store any additional feature information. With this update, the dashboard and several of our clients have built in support for additional features.

In addition to being able to define any number of features, we have also made it possible to define feature hierarchies. For example, we can define the following feature hierarchy:

Now, suppose the user opens ModuleB. With the above setup, we can either check if they have permission to use ModuleB or we can be more specific and require Submodule 1 to be present.

We will go through in more detail how you can get started later in the article. The feature template used for our above example is shown below:

["ModuleA", ["ModuleB", ["Submodule 1", "Submodule 2"]], "ModuleC", ["ModuleD", ["ModuleD1", ["Submodule D1", "Submodule D2"]]]]

Set up

Defining features

Let’s suppose we want to define the following feature hierarchy:

To define it, we can use a JSON array structure shown below:

["ModuleA", "ModuleB", "ModuleC"]

Suppose now that we want to add sub features to ModuleB. For example, Submodule 1 and Submodule 2. To do that, we introduce a new array instead of the string “Module B”, which has the following structure:

["Module B", ["Submodule 1", "Submodule 2"]]

The first element defines name of the module, and the second element should ways be a list of submodules.

We can keep adding submodules to submodules in a similar fashion.

To add your feature template to a product, you can click on Edit Feature Names on the product page and then scroll down until you see Feature Template.

In the example above, we would get the following feature hierarchy

It’s defined with the following feature template

["ModuleA", ["ModuleB", ["Submodule 1", "Submodule 2"]], "ModuleC"]

Assigning features

Once you have defined the feature template, the page to create a new license key and to edit existing one will have a box that allows you to define them, as shown below. The state will be stored in a data object with the name cryptolens_features, which we will cover in the next step.

Verifying features

At the time of writing, the Java client supports checking these additional features out of the box. You can do that using a special version of Helpers.HasFeature() method. For example, to check if Submodule1 is present, you can type

Helpers.HasFeature(license, "ModuleB.Submodule 1")

If you only want to check if ModuleB is present, without being specific, you can insteadwrite

Helpers.HasFeature(license, "ModuleB")

Plan ahead

Support for additional features is a fairly new feature so we would be grateful if you could report any errors or suggestions to us. At the time of writing, the Java client supports this out of the box. We plan to ship this to our other client libraries, starting with .NET. If you would like us to focus on a specific client library, please let us know.

As always, let us know if you have any questions 🙂

Node.js software licensing

Today we have released a client library for Node.js, which can be installed quite easily using the command below:

npm install cryptolens

Once it’s installed, you can verify a license key using the code below:

const Key = require('cryptolens').Key;

var RSAPubKey = "{Your RSA Public key, which can be found here: https://app.cryptolens.io/User/Security}";
var result = Key.Activate(token="{Access token with with Activate permission}", RSAPubKey, ProductId=3349, Key="GEBNC-WZZJD-VJIHG-GCMVD", MachineCode="test");

result.then(function(license) {
    if (!license) {
        // failure
        return;
    }
    
    // Please see https://app.cryptolens.io/docs/api/v3/model/LicenseKey for a complete list of parameters.
    console.log(license.Created);
});

If you want to load a license key (eg. for offline activation), you can use LoadFromString method available in the Helpers namespace. You can read more about it here.

Disclaimer: this is not an April joke, we support Node.js for real 🙂

Golang software licensing

Today, we have released a library for Golang, freely available on GitHub. It supports both key verification and offline verification. To verify a license key, the code below can be used:

token := "Access token"
publicKey := "RSA Public key"

licenseKey, err := cryptolens.KeyActivate(token, cryptolens.KeyActivateArguments{
	ProductId:   3646,
	Key:         "MPDWY-PQAOW-FKSCH-SGAAU",
	MachineCode: "289jf2afs3",
})
if err != nil || !licenseKey.HasValidSignature(publicKey) {
	fmt.Println("License key activation failed!")
	return
}

More examples can be found here.

Unity Software Licensing

Unity is a powerful cross-platform game engine. Since it uses C# as the scripting language, we can easily integrate it with Cryptolens client library. In this post, we explain how you can add license key verification into a Unity game and briefly cover payment integration.

Adding software licensing

  1. Download the binaries (please pick those without “System.Management”).
  2. Place these binaries into “Assets” folder.
  3. Add code from the key verification tutorial.

A sample Unity project can be found here.

Adding payments

Once licensing is in place, the next step is to add payment integration. Since Cryptolens is cloud-based, you can easily integrate it with your own billing system or use our existing integrations with popular platforms such as Stripe and PayPal. You can read more about how this can be accomplished here.

Please feel free to reach out should you have any questions!

Automating offline activations

Many times your customers may have either restricted internet access or no internet access at all. Although Cryptolens is a cloud-based licensing solution, you can still use it to protect offline devices. In this post, we cover three ways internet access can be restricted and how license key verification can be performed.

Periodic internet access

If your users are connected to the internet on a regular basis, we can cache the response from the “Activate” method each time we are able to contact the server. If, at some point, internet connection would not be present, we would fallback on a cached version of the license object.

When using this approach, it’s important to define how long time your users can be offline. There is a field called “SignDate” in the license key object, which is the time when the response was signed by the server (i.e. the last time you successfully called Activate). So, if you only want to allow your users to be offline for 30 days, you can compare the current date with the “SignDate”.

License server (re-routing)

If your users have certain devices that have no direct internet access, one option is to use a license server, which will re-route all requests through a server hosted by the user. Only the server has internet access.

There is currently a Windows version of the server, freely available on GitHub.

Air gap (no internet)

If the devices have no internet access at all, we can use a similar idea that was described in periodic internet access, with the only difference that we always fallback on the license file.

In Cryptolens, there are three ways you can create such a file:

In the dashboard

Next to each license key, there is a yellow button which can be used to create license files:

Using activation forms

Activation forms allow your customers to download activation files themselves.

Using the API

If you want to automate license file creation, you can either call the Activate method using one of our client APIs or call the Web API directly (eg. using curl).

Floating licenses in Java

Floating licenses makes it easier for your customers to switch between machines that actively run your software, without having to deactivate them first. For instance, you can constrain the number of concurrent users to 10, but still allow the software to be installed on eg. 100 computers.

In Cryptolens, floating licensing works by letting your app to regularly poll the server to check if the number of concurrent users has been exceeded, which can be accomplished with the code snippet below:

import io.cryptolens.methods.*;
import io.cryptolens.models.*;

public static void main(String args[]) {
    String RSAPubKey = "RSA Public Key";
    String auth = "Access token";

    LicenseKey license = Key.Activate(auth, RSAPubKey, new ActivateModel(3349, "MTMPW-VZERP-JZVNZ-SCPZM", Helpers.GetMachineCode(), 300, 1));
    if (license == null || !Helpers.IsOnRightMachine(license, true, true)) {
        System.out.println("The license does not work.");
    } else {
        System.out.println("The license is valid!");
        System.out.println("It will expire: " + license.Expires);
    }
}

Normally, if the app stops polling the server, that user will be automatically deactivated within the specified period of time. However, if you want to deactivate it instantly, you can use the code below:

import io.cryptolens.methods.*;
import io.cryptolens.models.*;

public static void main(String args[]) {
    String auth = "";

    boolean result = Key.Deactivate(auth, new DeactivateModel(3349, "MTMPW-VZERP-JZVNZ-SCPZM", Helpers.GetMachineCode(), true));
    if (result == true) {
        System.out.println("Deactivation successful.");
    } else {
        System.out.println("Deactivation failed.");
    }
}

To see all the required parameters, please check out the GitHub repo of the Java client. Should you have any questions, please feel free to reach out.