Tag: software licensing system

Manage and Create License Keys for Java Applications

If you want to manage and create license keys for Java applications, you have a few different alternatives to choose between. The simplest way to implement software licensing is to code a license key generator that performs partial key verification. However, for more serious and long-term use cases, a software licensing solution that performs full key verification is to be preferred. In this blog, we will briefly cover those two alternatives to help you license and protect your Java applications with license keys.

License Key Generator in Java

A software license solution has to create a lock in your Java project that only unlocks the application if the user inserts a valid license key. Creating a license key generator is a shortcut to licensing where your code performs partial key verification and generates subsets of license keys. However, such a solution is far from optimal for larger-scale use. The structure that you use to generate license keys will leak over time, and it is quite easy to bypass the homemade and lightweight licensing system. If you want to learn more, please read this blog post.

LaaS – Manage and Create License Keys for Java Applications

Coding a software licensing system that performs full key verification and has the necessary licensing features you need for an application in production will take a lot of time and money. Outsourcing software licensing to a Licensing as a Service (LaaS) provider such as Cryptolens is then a more optimal choice for many software companies. Then, you get all of the advanced licensing features at a fraction of the price of coding and maintaining a licensing system yourself.

Getting started with our software license manager for Java applications is easy! Our Java client API allows you to easily verify license keys, and you can read more about how to add it to your project on GitHub. You then have to sign up to our platform for free and add a code snippet to your Java code.

Below is an example of the code that you can use in your application.

import io.cryptolens.Cryptolens;
import io.cryptolens.Helpers;
import io.cryptolens.LicenseKey;

public class Main {

    public static void main(String[] args) {
        String RSAPubKey = "<RSAKeyValue><Modulus>sGbvxwdlDbqFXOMlVUnAF5ew0t0WpPW7rFpI5jHQOFkht/326dvh7t74RYeMpjy357NljouhpTLA3a6idnn4j6c3jmPWBkjZndGsPL4Bqm+fwE48nKpGPjkj4q/yzT4tHXBTyvaBjA8bVoCTnu+LiC4XEaLZRThGzIn5KQXKCigg6tQRy0GXE13XYFVz/x1mjFbT9/7dS8p85n8BuwlY5JvuBIQkKhuCNFfrUxBWyu87CFnXWjIupCD2VO/GbxaCvzrRjLZjAngLCMtZbYBALksqGPgTUN7ZM24XbPWyLtKPaXF2i4XRR9u6eTj5BfnLbKAU5PIVfjIS+vNYYogteQ==</Modulus><Exponent>AQAB</Exponent></RSAKeyValue>";

        Cryptolens cryptolens = Cryptolens.getDefault();
        cryptolens.setRSAPublicKey(RSAPubKey);

        Cryptolens.ActivateResponse response =
                cryptolens.activate( "WyIyNTk1IiwidVVrQm94OGlYS3pHZlhTc0x6Rm9mN1piektrT0FSd0REaFZ0ZXZJMSJd"
                        , 3349
                        , "ICVLD-VVSZR-ZTICT-YKGXL"
                        , Helpers.GetMachineCode()
                );

        if (!response.successful()) {
            System.out.println("Failed to activate!");
            Cryptolens.ActivateServerError er = response.getServerError();
            Exception ex = response.getException();

            if (er != null) {
                System.out.println("Server error: " + er);
            }

            if (ex != null) {
                ex.printStackTrace(System.out);
            }

            return;
        }

        LicenseKey licenseKey = response.getLicenseKey();

        System.out.println("Activation was successful!");
        System.out.println(licenseKey.getKey());
        System.out.println(licenseKey.getF1());
    }
}

Not a customer yet? Sign Up for a free trial and implement our software licensing system within minutes.

Python Code for Software Licensing

How do you create license keys for software in Python? Well, setting up a Python license key system is effortless with Cryptolens. Instead of coding your own solution from scratch, we have detailed guides and SDKs so you can set up key verification and protect your Python code. If you want to read more about the code-it-yourself VS outsourcing route, please read this blog post.

We have also made the following YouTube video that goes into detail about how you implement a Python license key manager:

Creating License Keys for a Python Application

A software license management solution has to establish a lock in your software code that only allows entry to people who put in a valid digital license key. If the key is invalid, or if they are unable to insert a key, the system should deny entry to the application. Without this system in place, anyone can access your software app, and it becomes very difficult to sell such a product. That is why a software licensing solution is important when protecting your code against unauthorized users.
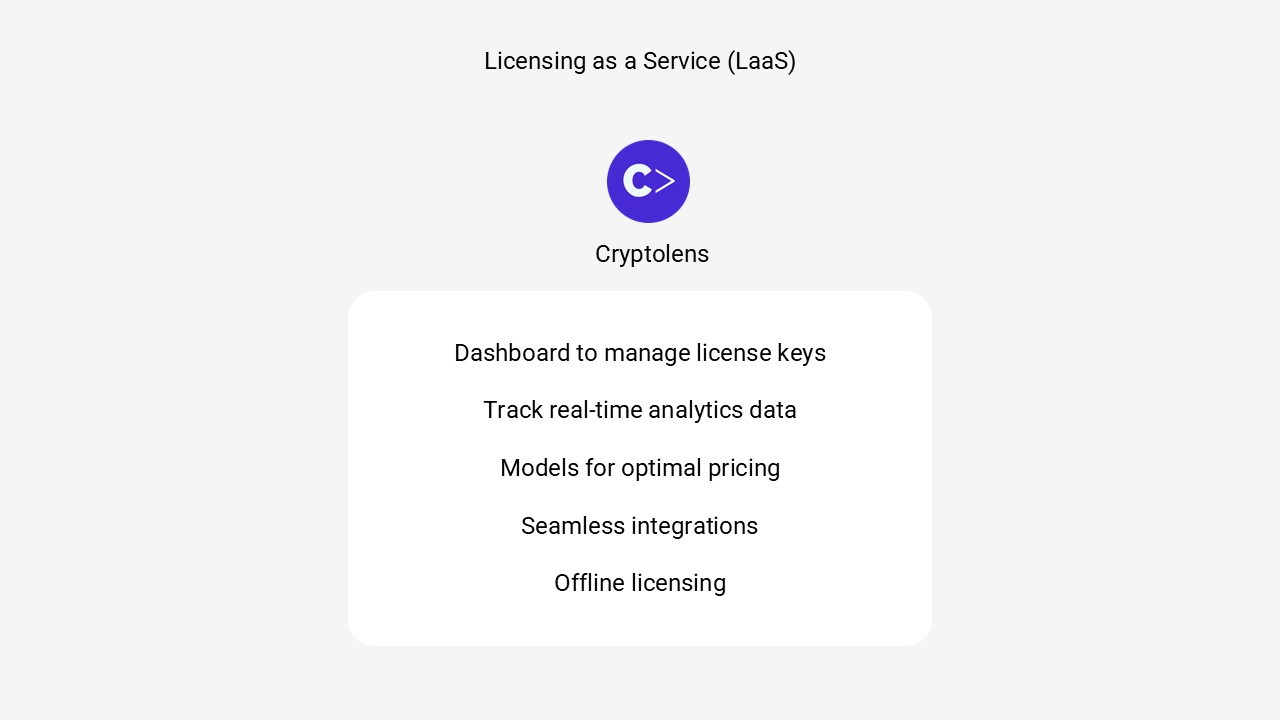
License key verification is effortless with Cryptolens in any coding language!

Licensing as a Service (LaaS) provider such as Cryptolens allows you to set up a license manager for Python within minutes that performs full key verification. This enables quicker software license implementation and you gain access to all of the advanced licensing techniques you will need, such as usage-based pricingoffline license verificationfloating and node-locked licenses, and user-account-based licensing.

Implementing a Python License Key System

Getting started with a cloud-based software license manager such as Cryptolens can be done by following 3 easy steps:

1. Install our Python SDK.

2. Create a free Cryptolens account.

3. Insert a code snippet into your code

1. Let us begin with the SDK. Cryptolens offers comprehensive SDKs in your favorite programming languages, including Python, to make it effortless to implement a Licensing as a Service (LaaS) platform within minutes. Install our Python SDK here.

2. Create a free Cryptolens account to get access to our easy-to-use dashboard where you can create and manage license keys and restrictions. You can also find your access tokens and other parameters that you have to insert into your code. Cryptolens offers you a way to implement licensing for free at your own pace, and you only have to pay when you get customers of your own. Check out our pricing plans here, and you can always get started for free.

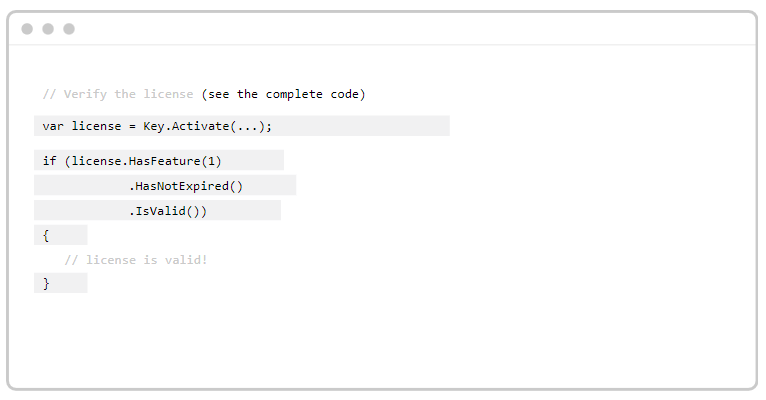
3. The last step for implementing a Python license key system is to insert a code snippet into your application’s code. We provide comprehensive help guides to make the implementation seem effortless. See the full code snippet in your programming language here. This is an overview of what the Python code snippet looks like:

from licensing.helpers import Helpers
from licensing.models import Response, RSAPublicKey
from licensing.methods import Key

pubKey = "<RSAKeyValue><Modulus>sGbvxwdlDbqFXOMlVUnAF5ew0t0WpPW7rFpI5jHQOFkht/326dvh7t74RYeMpjy357NljouhpTLA3a6idnn4j6c3jmPWBkjZndGsPL4Bqm+fwE48nKpGPjkj4q/yzT4tHXBTyvaBjA8bVoCTnu+LiC4XEaLZRThGzIn5KQXKCigg6tQRy0GXE13XYFVz/x1mjFbT9/7dS8p85n8BuwlY5JvuBIQkKhuCNFfrUxBWyu87CFnXWjIupCD2VO/GbxaCvzrRjLZjAngLCMtZbYBALksqGPgTUN7ZM24XbPWyLtKPaXF2i4XRR9u6eTj5BfnLbKAU5PIVfjIS+vNYYogteQ==</Modulus><Exponent>AQAB</Exponent></RSAKeyValue>"

res = Key.activate(token="WyIyNTU1IiwiRjdZZTB4RmtuTVcrQlNqcSszbmFMMHB3aWFJTlBsWW1Mbm9raVFyRyJd",\
                   rsa_pub_key=pubKey,\
                   product_id=3349, key="ICVLD-VVSZR-ZTICT-YKGXL", machine_code="test")

if res[0] == None:
    print("An error occured: {0}".format(res[1]))
else:
    print("Success")

AutoCAD plugin software licensing

AutoCAD® is a powerful computer-aided design (CAD) software. It’s also quite extensible since anyone can easily create plug-ins. In this post, we briefly summarise several tips on how to securely license and sell your AutoCAD plug-ins.

Creating the plugin

If you are about to create a new AutoCAD plug-in, we would recommend to review the following tutorial provided by Autodesk.

Adding software licensing

Assuming you have Visual Studio 2017 open, you can add a simple key verification mechanism as described below:

  1. Right click on your project in the Solution Explorer and click on Manage NuGet Packages.
  2. Search for Cryptolens.Licensing and install it.
  3. Add the code-snippet form this page in the code where the plugin loads for the first time.

Selling the plug-in

One way to sell AutoCAD plug-ins is by publishing them in the Autodesk App Store, where a basic licensing mechanism is already provided. The problem with this approach is that the licensing models available are quite limited (eg. you can only charge your customers once for the plug-in and they will be able to use it in perpetuity). For instance, selling your plug-in as a service (subscription model) is not supported.

A better approach is to still publish your plug-in in the Autodesk App Store and set it to be a free app. You can then ask your customers to get a separate license key to be able to unlock all features.

You can read more about various ways of selling your software in our help pages. I would also recommend to check out the available licensing models.

If you have any questions, please feel free to reach out!


Overdraft software licensing

Several months ago, we introduced support for floating licenses, which, in simple terms, is a way to permit a certain number of concurrent end users at a time.

Overdraft license is a way to allow your users to temporarily exceed the upper bound of the number of concurrent licenses to take into account for potential peak usages. Once this occurs, a special event is going to be registered so that you can increase the limit in the next billing cycle.

In .NET, this can be implemented as follows (below, we allow the users to exceed the upper bound by one more concurrent license):

var auth = "{access token with permission to access the activate method}";
var result = Key.Activate(token: auth, parameters: new ActivateModel()
{
    Key = licenseKey,
    ProductId = 3349,
    Sign = true,
    MachineCode = Helpers.GetMachineCode(),
    FloatingTimeInterval = 100, // needed for floating licenses
    MaxOverdraft = 1            // needed to allow overdraft
});

if(Helpers.IsOnRightMachine(res2.LicenseKey, isFloatingLicense: true, allowOverdraft: true))
{
    // everything OK!
}

You can read more about this on our help pages.


Not a customer yet? Sign Up for a free trial and implement our software licensing system within minutes.

SendOwl and DPD integrations with Software Licensing

On a mission to make software licensing more accessible, we have recently improved our Web API to make integrations with other services easier. For example, we have made it possible to return license keys as plain text, which many third party platforms require.

When selling software, there are two problems that need to be solved: payment processing and software licensing. Cryptolens core has always been the comprehensive licensing API. If you are using SendOwl or DPD, you can keep using them for payments and Cryptolens for software licensing.

If you have a new project, I would recommend to check out our new tutorial about built-in recurring payments and payment forms.


Not a customer yet? Sign Up for a free trial and implement our software licensing system within minutes.

Cryptolens joins Stripe partner program

Most people today don’t know that only three percent of GDP is online. That’s why we’re
excited to join the Stripe Partner Program to increase internet commerce and help
companies start, run, and scale their businesses.

By joining the program, our mutual customers will now benefit from the combination of
Cryptolens secure licensing platform with Stripe’s seamless payments platform.

We believe that removing barriers to online commerce helps more new businesses get
started, levels the playing field, and increases economic output and trade around the
world. Together with Stripe, our mission is to bring more commerce online and increase
the GDP of the internet.


Not a customer yet? Sign Up for a free trial and implement our software licensing system within minutes.

Recurring Payments with Stripe combined with Software Licensing

A popular licensing model amongst software vendors is subscription-based licensing. It is generally seen as a smaller risk for the customer than traditional one-time payments (eg. which normally require a large commitment), but at the same time it provides recurring revenues for the software vendor.

You can get started with recurring payments by visit our help pages.

Features

Recurring payments are implemented as a part of the customer portal. Thanks to this update, customers can not only manage their existing licenses but also subscribe for new ones.

Everything related to payments, plans and subscriptions is managed by Stripe, so if you’re already using Stripe, it’s quite easy to get started with the new recurring payments feature. If you do not have Stripe, it’s quite easy to get started. A tutorial can be found here.

In addition to recurring payments, the customer portal makes it possible to use user account authentication, described in the previous article.

Screenshots

Example when the customer has subscribed to a new plan:

The new license will show up on the home page of the customer:

Reviewing a license key and the subscription it is associated with:


Not a customer yet? Sign Up for a free trial and implement our software licensing system within minutes.

License Key System for PHP Applications

If you want to implement a license key system for PHP applications, you have several options to choose between. A short-term and quite simple way is to code a license key generator and generate a subset of license keys. However, for more serious and in-production use cases, we would recommend having a software license solution that is much more long-term and robust. In this blog, we will briefly cover these two alternatives to help you license and protect your PHP code.

License Key Generator for PHP Applications

A license key generator is a simple and lightweight licensing system that checks the validity of a subset of license keys using partial key verification. While this option is a pretty fast and easy way to implement software licensing for PHP apps, it is not recommended for long-term and more serious use cases. The reasons are that the system is quite easy to bypass, and the structure you use to generate license keys will begin to leak over time. If you want to learn more about this approach, please read this blog post.

Outsourced License Key System for PHP Applications

Instead of having to code a more robust license manager that performs full key verification, the best way to implement software licensing for your PHP application is to work with a Licensing as a Service (LaaS) provider such as Cryptolens. You will then get access to all of our advanced licensing features from day 1, such as offline licensing and more advanced licensing models. Coding and maintaining your own licensing system will take a lot of time, so why not outsource licensing to experts?

Getting started with our license key system for PHP applications is effortless! We have an SDK available on GitHub, and you can sign up to our platform for free. Then, you just need to paste a short code snippet into your PHP code. It looks something like this:

<?php
require_once('Cryptolens.php');

$activate = cryptolens_activate(
      // Access token
      'WyI0NjUiLCJBWTBGTlQwZm9WV0FyVnZzMEV1Mm9LOHJmRDZ1SjF0Vk52WTU0VzB2Il0='
      // Product Id
    , 3646
      // License Key
    , 'MPDWY-PQAOW-FKSCH-SGAAU'
      // Machine code
    , '289jf2afs3'
    );

// $activate is now a boolean indicating if the activation attempt was successful or not

?>

Not a customer yet? Sign Up for a free trial and implement our software licensing system within minutes.

Protecting Software with Obfuscation and Software Licensing

Software applications can be secured with two layers of protection. The first layer is software licensing, whose aim is to enforce a license model (eg. by restricting the number of machines where the application can run). The second layer is software obfuscation, where the end goal is to make it hard or impossible for the end users read and alter the source code. In this article, we will focus on obfuscation.

Types of obfuscations

There are two ways of making it harder for the adversary to read or alter the source code. We can either achieve it by altering the source in such a way that more time is necessary to understand how the code works and to make it harder to remove existing licensing logic (eg. for key verification). This is usually what is thought of as obfuscation. The second approach is to move critical code away from the client machine to your own servers and provide it as an API endpoint that your application will call.

Both methods have their pros and cons. In the case of code obfuscation, you can relative easily increase the difficultly of reverse engineering at the cost of that eventually the source code will be reversed engineered or licensing logic bypassed. With custom API endpoints, you always retain control of code execution (since it runs on your servers) and if everything is correctly implemented, it’s impossible to reverse engineer the code. This is at the cost of requiring active internet connection to your server and potentially some regulatory issues (since data has to be transferred to your servers).

Conventional obfuscators

There are many obfuscators out there, some that even are free of charge. For the .NET platform, you can either use Ofuscar or ConfuserEx. The idea behind all of them is to make the IL code (which C# and VB.NET compile to) harder to read for an adversary. They should be quite easy to use, so you can simply add the key verification logic anywhere in the software.

API endpoints

Creating an API endpoint for highly sensitive code is the best way to protect it against reverse engineering. Although it may sound as very cumbersome to set up and maintain, the good news is that most cloud providers today support some form of serverless computing. We will describe how this is achieved using Azure Functions, but it should be fairly similar to other cloud platforms. The reason why we chose the serverless model is because it abstracts most things away, allowing you to focus on expressing the actual method. Moreover, cloud providers tend to allow a “per request” model, meaning that you do not have to pay for the time when the application is idle.

Azure Functions demo

To create an Azure function, go to the Azure portal and create a new “Function App”. You can then select either “consumption plan” or “app service plan” (please see this for more details). Once it’s set up, create a new HTTP Trigger and change the run.csx as shown below. To get the license verification to work, we will need to add an additional file, function.proj (or project.json for older versions of the runtime), which we cover further down in the article.

run.csx
#r "Newtonsoft.Json"

using System.Net;
using Microsoft.AspNetCore.Mvc;
using Microsoft.Extensions.Primitives;
using Newtonsoft.Json;

using SKM.V3;
using SKM.V3.Models;
using SKM.V3.Methods;

public static async Task Run(HttpRequest req, ILogger log)
{
    // this function will return 'Hello, <name>' if the correct license key is provided.

    // licensekey and machinecode stored as query string
    if(!KeyVerification(req.Query["licensekey"], req.Query["machinecode"])) 
    {
        return new BadRequestObjectResult("License key verification failed");        
    }
    
    string name = req.Query["name"];

    return name != null
        ? (ActionResult)new OkObjectResult($"Hello, {name}")
        : new BadRequestObjectResult("Please pass a name on the query string or in the request body");
}

public static bool KeyVerification(string licenseKey, string machineCode) {

    var RSAPubKey = "<RSA public key>";

    var auth = "<access token>";
    var result = Key.Activate(token: auth, parameters: new ActivateModel()
    {
        Key = licenseKey,
        ProductId = 3349,
        Sign = true,
        MachineCode = machineCode
    });

    if (result == null || result.Result == ResultType.Error ||
        !result.LicenseKey.HasValidSignature(RSAPubKey).IsValid())
    {
        // an error occurred or the key is invalid or it cannot be activated
        // (eg. the limit of activated devices was achieved)
        Console.WriteLine("The license does not work.");
        return false;
    }
    else
    {
        // everything went fine if we are here!
        Console.WriteLine("The license is valid!");
        return true;
    }
}
function.proj

In order to add support for license key verification, we need to add Cryptolens.Licensing. Depending on the version of function apps that you are using, you might either need to create a project.json or function.proj file. The newest version of the runtime uses function.proj.

<Project Sdk="Microsoft.NET.Sdk">
<PropertyGroup>
    <TargetFramework>netstandard2.0</TargetFramework>
  </PropertyGroup>
 
  <ItemGroup>
    <PackageReference Include="Cryptolens.Licensing" Version="4.0.9.2"/>
  </ItemGroup>
 
</Project> 

In case you get any issues with namespaces not being found, it can be useful to try to re-create the function entirely.

Accessing form client side

In order to access your method through the client application, we can use RestSharp or similar library. When you click on “Get function url”, you will get a string similar to “https://<cluster-name>.azurewebsites.net/api/HttpTriggerCSharp1?live=<secret key>”. The live parameter may not be present for some access levels

var client = new RestClient("https://<cluster-name>.azurewebsites.net/api/");
var request = new RestRequest("HttpTriggerCSharp1", Method.GET);
//request.AddParameter("code", "<secret key>"); // depending on access level of the function in Azure

// for licensing
request.AddParameter("licensekey", "AAAA-BBBB-CCCC-DDDD");
request.AddParameter("machinecode", Helpers.GetMachineCode());

// parameter to our function
request.AddParameter("name", "Bob");

var result = client.Get(request);

Console.WriteLine(result.Content);

Console.ReadLine();

If all worked out correctly, we should see “Hello, Bob” in the terminal.

Privacy

The best advice when it comes to privacy is to send as little personal identifiable information as possible. Always ask yourself what data really needs to be processed externally. Even if it is not always possible to make it entirely anonymous, it’s good to strive to at least pseudo-anonymize data (i.e. associate an id to each user instead of using their real name). In some cases, such as with IP address, you can remove the last digits, eg. from 10.1.1.5 to 10.1.1.0 without affecting the geographical data of the IP. For advanced users, you might want to look into homomorphic encryption and follow the recent research.


Not a customer yet? Sign Up for a free trial and implement our software licensing system within minutes.